Weapons: Difference between revisions
From ARC Raiders Wiki
More actions
Content deleted Content added
No edit summary |
fixed all weapons' Firing Mode |
||
| (22 intermediate revisions by 6 users not shown) | |||
| Line 1: | Line 1: | ||
'''Weapons''' are the main method used to damage [[Raider|Raiders]] and [[ARC]]. Each weapon is classed within a different [[Ammo]] |
'''Weapons''' are the main method used to damage [[Raider|Raiders]] and [[ARC]]. Each weapon is classed within a different [[Ammo]] type, and each Ammo type has its own penetration value. The weapons also have classes, which changes their effectiveness in various combat scenarios. |
||
===Assault Rifles=== |
===Assault Rifles=== |
||
{| class="wikitable sortable" |
{| class="wikitable sortable" |
||
!Weapon!!Image |
!Weapon!!Image||Ammo Type||Firing Mode!!Damage |
||
!Firing Rate |
|||
!Relative DPS!!Range |
|||
|- |
|- |
||
|'''[[Kettle]]'''||[[File:Kettle-Level1.png|link=Kettle|180px]]||Light |
|'''[[Kettle]]'''||[[File:Kettle-Level1.png|link=Kettle|180px]]||Light||Semi-Automatic||10 |
||
|28 |
|||
|280||42.8 |
|||
|- |
|- |
||
|'''[[Rattler]]'''||[[File:Rattler-Level1.png|link=Rattler|180px]]||Medium |
|'''[[Rattler]]'''||[[File:Rattler-Level1.png|link=Rattler|180px]]||Medium||Fully-Automatic||9 |
||
|33.3 |
|||
|299.7||56.2 |
|||
|- |
|- |
||
|'''[[Arpeggio]]'''||[[File:Arpeggio-Level1.png|link=Arpeggio|180px]]||Medium |
|'''[[Arpeggio]]'''||[[File:Arpeggio-Level1.png|link=Arpeggio|180px]]||Medium||3-Round Burst||9.5 |
||
|18.3 |
|||
|'''173.9'''||55.9 |
|||
|- |
|- |
||
|'''[[Tempest]]'''||[[File:Tempest-Level1.png|link=Tempest|180px]]||Medium |
|'''[[Tempest]]'''||[[File:Tempest-Level1.png|link=Tempest|180px]]||Medium||Fully-Automatic||10 |
||
|36.7 |
|||
|367||55.9 |
|||
|- |
|- |
||
|'''[[Bettina]]'''||[[File:Bettina.png|link=Bettina|180px]]||Heavy |
|'''[[Bettina]]'''||[[File:Bettina.png|link=Bettina|180px]]||Heavy||Fully-Automatic||14 |
||
|32 |
|||
|448||51.3 |
|||
|} |
|} |
||
===Battle Rifles=== |
===Battle Rifles=== |
||
{| class="wikitable sortable" |
{| class="wikitable sortable" |
||
!Weapon!!Image!!Ammo Type |
!Weapon!!Image!!Ammo Type!!Firing Mode!!Damage |
||
!Firing Rate |
|||
!Relative DPS!!Range |
|||
|- |
|- |
||
|'''[[Ferro]]'''||[[File:Ferro-Level1.png|link=Ferro|180px]]||Heavy Ammo|| |
|'''[[Ferro]]'''||[[File:Ferro-Level1.png|link=Ferro|180px]]||Heavy Ammo||Break-Action||40 |
||
|6.6 |
|||
|264||53.1 |
|||
|- |
|- |
||
|'''[[Renegade]]'''||[[File:Renegade-Level1.png|link=Renegade|180px]]||Medium Ammo|| |
|'''[[Renegade]]'''||[[File:Renegade-Level1.png|link=Renegade|180px]]||Medium Ammo||Lever-Action||35 |
||
|21 |
|||
|735||68.8 |
|||
|} |
|} |
||
===Submachine Guns=== |
===Submachine Guns=== |
||
{| class="wikitable sortable" |
{| class="wikitable sortable" |
||
!Weapon!!Image!!Ammo Type |
!Weapon!!Image!!Ammo Type!!Firing Mode!!Damage |
||
!Firing Rate |
|||
!Relative DPS!!Range |
|||
|- |
|- |
||
|'''[[Stitcher]]'''||[[File:Stitcher-Level1.png|link=Stitcher|180px]]||Light Ammo|| |
|'''[[Stitcher]]'''||[[File:Stitcher-Level1.png|link=Stitcher|180px]]||Light Ammo||Fully-Automatic||7 |
||
|45.3 |
|||
|'''317.1'''||42.1 |
|||
|- |
|- |
||
|'''[[Bobcat]]'''||[[File:Bobcat-Level1.png|link=Bobcat|180px]]||Light Ammo|| |
|'''[[Bobcat]]'''||[[File:Bobcat-Level1.png|link=Bobcat|180px]]||Light Ammo||Fully-Automatic||6 |
||
|66.7 |
|||
|400||44 |
|||
|- |
|- |
||
|} |
|} |
||
| Line 37: | Line 61: | ||
===Shotguns=== |
===Shotguns=== |
||
{| class="wikitable sortable" |
{| class="wikitable sortable" |
||
!Weapon!!Image!!Ammo Type |
!Weapon!!Image!!Ammo Type!!Firing Mode!!Damage |
||
!Firing Rate |
|||
!Relative DPS!!Range |
|||
|- |
|- |
||
|'''[[Il Toro]]'''||[[File:Il_Toro-Level1.png|link=Il_Toro|180px]]||Shotgun Ammo||67.5 |
|'''[[Il Toro]]'''||[[File:Il_Toro-Level1.png|link=Il_Toro|180px]]||Shotgun Ammo||Pump-Action||67.5 |
||
|14.3 |
|||
|'''965.3'''||20 |
|||
|- |
|- |
||
|'''[[Vulcano]]'''||[[File:Vulcano-Level1.png|link=Vulcano|180px]]||Shotgun Ammo||49.5 |
|'''[[Vulcano]]'''||[[File:Vulcano-Level1.png|link=Vulcano|180px]]||Shotgun Ammo||Semi-Automatic||49.5 |
||
|26.3 |
|||
|'''1,302.9'''||26 |
|||
|} |
|} |
||
===Pistols=== |
===Pistols=== |
||
{| class="wikitable sortable" |
{| class="wikitable sortable" |
||
!Weapon!!Image!!Ammo Type |
!Weapon!!Image!!Ammo Type!!Firing Mode!!Damage |
||
!Firing Rate |
|||
!Relative DPS!!Range |
|||
|- |
|- |
||
|'''[[Hairpin]]'''||[[File:Hairpin-Level1.png|link=Hairpin|180px]]||Light Ammo|| |
|'''[[Hairpin]]'''||[[File:Hairpin-Level1.png|link=Hairpin|180px]]||Light Ammo||Slide-Action||20 |
||
|9 |
|||
|180||38.6 |
|||
|- |
|- |
||
|'''[[Burletta]]'''||[[File:Burletta-Level1.png|link=Burletta|180px]]||Light Ammo|| |
|'''[[Burletta]]'''||[[File:Burletta-Level1.png|link=Burletta|180px]]||Light Ammo||Semi-Automatic||10 |
||
|28 |
|||
|280||41.7 |
|||
|- |
|- |
||
|'''[[Anvil]]'''||[[File:Anvil-Level1.png|link=Anvil|180px]]||Heavy Ammo |
|'''[[Anvil]]'''||[[File:Anvil-Level1.png|link=Anvil|180px]]||Heavy Ammo||Single-Action||40 |
||
|16.3 |
|||
|652||50.2 |
|||
|- |
|- |
||
|'''[[Venator]]'''||[[File:Venator-Level1.png|link=Venator|180px]]||Medium Ammo|| |
|'''[[Venator]]'''||[[File:Venator-Level1.png|link=Venator|180px]]||Medium Ammo||Semi-Automatic||18 |
||
|36.7 |
|||
|'''660.6'''||48.4 |
|||
|} |
|} |
||
===Light Machineguns=== |
===Light Machineguns=== |
||
{| class="wikitable sortable" |
{| class="wikitable sortable" |
||
!Weapon!!Image!!Ammo Type |
!Weapon!!Image!!Ammo Type!!Firing Mode!!Damage |
||
!Firing Rate |
|||
!Relative DPS!!Range |
|||
|- |
|- |
||
|'''[[Torrente]]'''||[[File:Torrente-Level1.png|link=Torrente|180px]]||Medium Ammo|| |
|'''[[Torrente]]'''||[[File:Torrente-Level1.png|link=Torrente|180px]]||Medium Ammo||Fully-Automatic||8 |
||
|58.3 |
|||
|'''466.4'''||49.9 |
|||
|} |
|} |
||
===Sniper Rifles=== |
===Sniper Rifles=== |
||
{| class="wikitable sortable" |
{| class="wikitable sortable" |
||
!Weapon!!Image!!Ammo Type |
!Weapon!!Image!!Ammo Type!!Firing Mode!!Damage |
||
!Firing Rate |
|||
!Relative DPS!!Range |
|||
|- |
|- |
||
|'''[[Osprey]]'''||[[File:Osprey-Level1.png|link=Osprey|180px]]||Medium Ammo|| |
|'''[[Osprey]]'''||[[File:Osprey-Level1.png|link=Osprey|180px]]||Medium Ammo||Bolt-Action||45 |
||
|17.7 |
|||
|'''796.5'''||80.3 |
|||
|- |
|- |
||
|'''[[Jupiter]]'''||[[File:Jupiter-Level1.png|link=Jupiter|180px]]||Energy Clip|| |
|'''[[Jupiter]]'''||[[File:Jupiter-Level1.png|link=Jupiter|180px]]||Energy Clip||Bolt-Action||55 |
||
|7.7 |
|||
|'''423.5'''||71.7 |
|||
|} |
|} |
||
===Special=== |
===Special=== |
||
{| class="wikitable sortable" |
{| class="wikitable sortable" |
||
!Weapon!!Image!!Ammo Type |
!Weapon!!Image!!Ammo Type!!Firing Mode!!Damage |
||
!Firing Rate |
|||
!Relative DPS!!Range |
|||
|- |
|- |
||
|'''[[Equalizer]]'''||[[File:Equalizer-Level1.png|link=Equalizer|180px]]||Energy Clip|| |
|'''[[Equalizer]]'''||[[File:Equalizer-Level1.png|link=Equalizer|180px]]||Energy Clip||Fully-Automatic||8 |
||
|33.3 |
|||
|'''266.4'''||68.6 |
|||
|- |
|- |
||
|'''[[Hullcracker]]'''||[[File:Hullcracker-Level1.png|link=Hullcracker|180px]]||Launcher Ammo|| |
|'''[[Hullcracker]]'''||[[File:Hullcracker-Level1.png|link=Hullcracker|180px]]||Launcher Ammo||Pump-Action||100 |
||
|20.3 |
|||
|'''2,030'''||38.9 |
|||
|} |
|} |
||
| Line 89: | Line 145: | ||
Check each weapon's individual page to see which modifications slots are available and compatible. |
Check each weapon's individual page to see which modifications slots are available and compatible. |
||
=== Ammo === |
|||
[[Ammo]] for weapons can be found scattered around the map. You can also find ammunition on knocked out raiders and destroyed [[ARC]]. |
|||
<nowiki>*</nowiki>Weapon sell price is now tied to remaining durability and upgrade tier. |
|||
Latest revision as of 14:49, 10 November 2025
Weapons are the main method used to damage Raiders and ARC. Each weapon is classed within a different Ammo type, and each Ammo type has its own penetration value. The weapons also have classes, which changes their effectiveness in various combat scenarios.
Assault Rifles
| Weapon | Image | Ammo Type | Firing Mode | Damage | Firing Rate | Relative DPS | Range |
|---|---|---|---|---|---|---|---|
| Kettle | 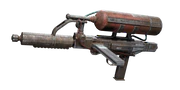 |
Light | Semi-Automatic | 10 | 28 | 280 | 42.8 |
| Rattler | 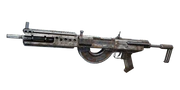 |
Medium | Fully-Automatic | 9 | 33.3 | 299.7 | 56.2 |
| Arpeggio | 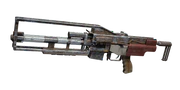 |
Medium | 3-Round Burst | 9.5 | 18.3 | 173.9 | 55.9 |
| Tempest | 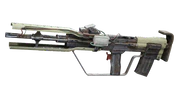 |
Medium | Fully-Automatic | 10 | 36.7 | 367 | 55.9 |
| Bettina | 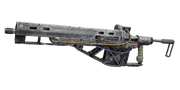 |
Heavy | Fully-Automatic | 14 | 32 | 448 | 51.3 |
Battle Rifles
| Weapon | Image | Ammo Type | Firing Mode | Damage | Firing Rate | Relative DPS | Range |
|---|---|---|---|---|---|---|---|
| Ferro | 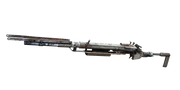 |
Heavy Ammo | Break-Action | 40 | 6.6 | 264 | 53.1 |
| Renegade | 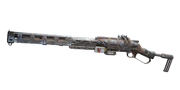 |
Medium Ammo | Lever-Action | 35 | 21 | 735 | 68.8 |
Submachine Guns
| Weapon | Image | Ammo Type | Firing Mode | Damage | Firing Rate | Relative DPS | Range |
|---|---|---|---|---|---|---|---|
| Stitcher | 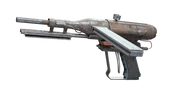 |
Light Ammo | Fully-Automatic | 7 | 45.3 | 317.1 | 42.1 |
| Bobcat | 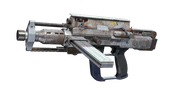 |
Light Ammo | Fully-Automatic | 6 | 66.7 | 400 | 44 |
Shotguns
| Weapon | Image | Ammo Type | Firing Mode | Damage | Firing Rate | Relative DPS | Range |
|---|---|---|---|---|---|---|---|
| Il Toro | 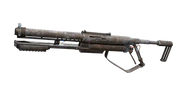 |
Shotgun Ammo | Pump-Action | 67.5 | 14.3 | 965.3 | 20 |
| Vulcano | 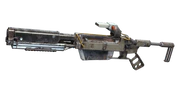 |
Shotgun Ammo | Semi-Automatic | 49.5 | 26.3 | 1,302.9 | 26 |
Pistols
| Weapon | Image | Ammo Type | Firing Mode | Damage | Firing Rate | Relative DPS | Range |
|---|---|---|---|---|---|---|---|
| Hairpin |  |
Light Ammo | Slide-Action | 20 | 9 | 180 | 38.6 |
| Burletta | 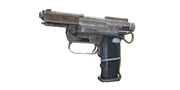 |
Light Ammo | Semi-Automatic | 10 | 28 | 280 | 41.7 |
| Anvil | 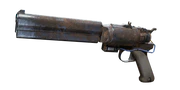 |
Heavy Ammo | Single-Action | 40 | 16.3 | 652 | 50.2 |
| Venator | 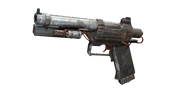 |
Medium Ammo | Semi-Automatic | 18 | 36.7 | 660.6 | 48.4 |
Light Machineguns
| Weapon | Image | Ammo Type | Firing Mode | Damage | Firing Rate | Relative DPS | Range |
|---|---|---|---|---|---|---|---|
| Torrente |  |
Medium Ammo | Fully-Automatic | 8 | 58.3 | 466.4 | 49.9 |
Sniper Rifles
| Weapon | Image | Ammo Type | Firing Mode | Damage | Firing Rate | Relative DPS | Range |
|---|---|---|---|---|---|---|---|
| Osprey | 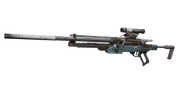 |
Medium Ammo | Bolt-Action | 45 | 17.7 | 796.5 | 80.3 |
| Jupiter | 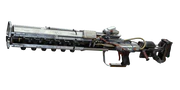 |
Energy Clip | Bolt-Action | 55 | 7.7 | 423.5 | 71.7 |
Special
| Weapon | Image | Ammo Type | Firing Mode | Damage | Firing Rate | Relative DPS | Range |
|---|---|---|---|---|---|---|---|
| Equalizer | 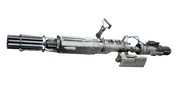 |
Energy Clip | Fully-Automatic | 8 | 33.3 | 266.4 | 68.6 |
| Hullcracker | 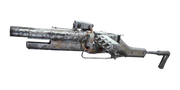 |
Launcher Ammo | Pump-Action | 100 | 20.3 | 2,030 | 38.9 |
Weapon Attachments
Weapon Modifications are items you can throw onto your weapons in and out of raid that provide upgrades to you weapons.
Craft them at the Gunsmith in your workshop, find them in raid, or buy some basic modifications from Tian Wen.
Check each weapon's individual page to see which modifications slots are available and compatible.