Practice Range: Difference between revisions
From ARC Raiders Wiki
More actions
Content deleted Content added
m Text replacement - "Infobox_Maps" to "Infobox_maps" |
Added some information about weapons not losing durability in the Practice Range and not being able to carry items from the Practice Range |
||
| (2 intermediate revisions by one other user not shown) | |||
| Line 1: | Line 1: | ||
{{stub}} |
{{stub}} |
||
{{Infobox_map |
|||
{{Infobox_maps |
|||
|image=Practice_Range.png |
|image=Practice_Range.png |
||
|name=Practice Range |
|name=Practice Range |
||
| Line 6: | Line 6: | ||
|difNV= None |
|difNV= None |
||
}} |
}} |
||
The '''Practice Range''' allows you to test out your weapons and gear within a safe area. |
|||
More info gomming soon |
|||
Any spent ammunition and durability will not carry over once you leave the Practice Range, meaning you can safely test any weapon or gadget from your Loadout without penalty. |
|||
Likewise, any item, ammunition, weapon acquired in the Practice Range will be removed from your Loadout as you head back to Speranza or close the game. |
|||
[[Category:Maps]] |
[[Category:Maps]] |
||
Latest revision as of 16:04, 7 November 2025
This article is a stub. This article needs some work! You can help us out by expanding it
 | |
| Practice Range | |
|---|---|
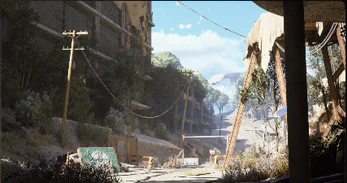
| The practice range of the game | |
| Difficulty | |
| Normal Variant | None |
The Practice Range allows you to test out your weapons and gear within a safe area.
Any spent ammunition and durability will not carry over once you leave the Practice Range, meaning you can safely test any weapon or gadget from your Loadout without penalty.
Likewise, any item, ammunition, weapon acquired in the Practice Range will be removed from your Loadout as you head back to Speranza or close the game.